
The Candy Stripe friendship bracelet is an excellent pattern for newbies on account of it’s easy to review and solely requires one type of knot. You’ll be able to memorize the pattern in a short time the least bit! Maintain learning to be taught to make your very private bracelet!

Making a Candy Stripe Friendship bracelet may very well be very straightforward, nevertheless the finished bracelet appears to be very good! In actuality, the first friendship bracelet I ever made was a Candy Stripe pattern.
In case you’re new to creating friendship bracelets, I prefer to suggest learning my publish Make Friendship Bracelets and Tie the 4 Basic Friendship Bracelet Knots sooner than you start this Candy Stripe tutorial.

Provides
You don’t need quite a few offers to make friendship bracelets – only a few embroidery floss and a few regularly devices.
- embroidery floss in various colors
- a safety pin, clipboard or masking tape
- a pair of scissors
- a ruler or measuring tape
Pattern
Proper right here is the written pattern for the diagonal stripe friendship bracelet. For extra info, check out Be taught Friendship Bracelet Patterns.
Choose your colors and put collectively your strings.
On this occasion, I’ve used 4 strings. Nonetheless you must use any number of strings you need. 4 strings offers you a slim bracelet and be faster to make. 8 strings offers you a wider bracelet, nevertheless take longer to make.
In the event you want inspiration for coloration combos, check out Friendship Bracelet Shade Ideas and Mixtures.
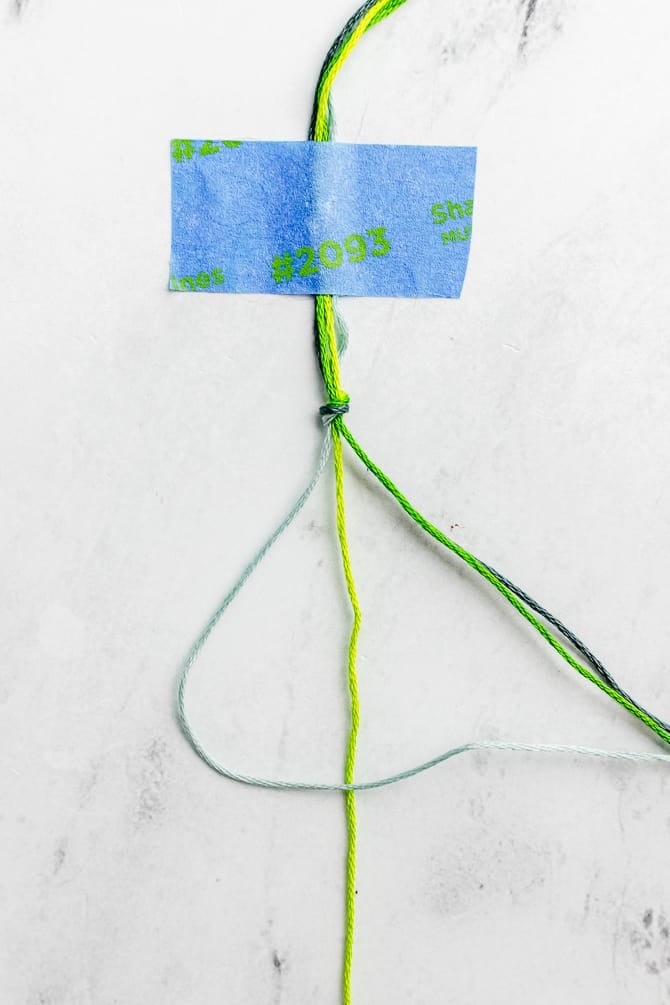
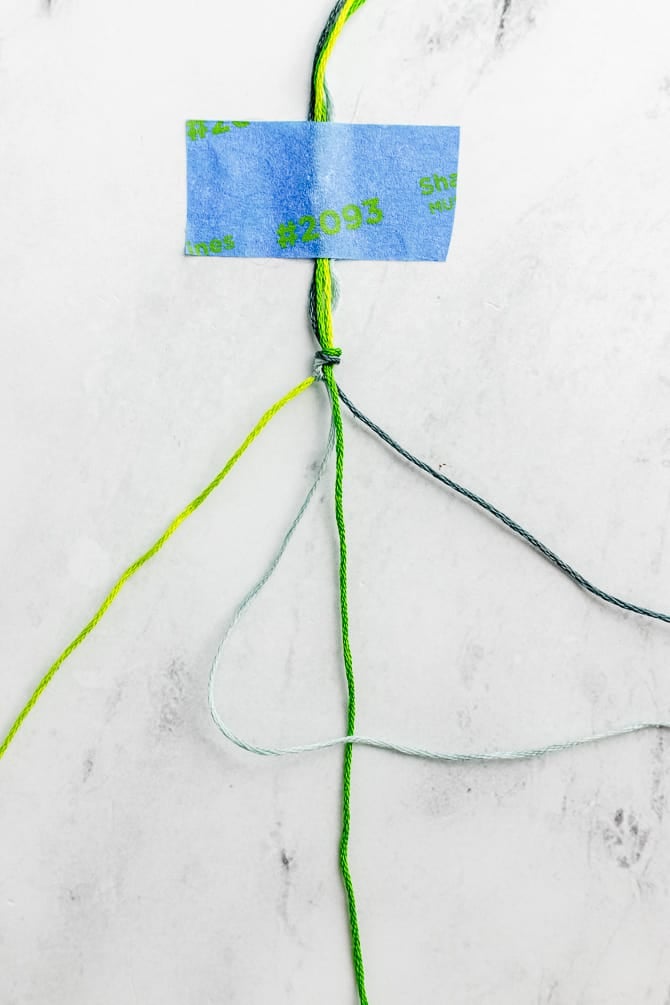
Cut back each string to be about 36″ prolonged. Tie them together with an overhand knot. Use masking tape or a clipboard to secure the strings once you make the bracelet.
Separate and put together your strings. To make understanding this pattern easier, let’s label the strings A-D from left to correct.
In my images, A is light blue, B is light inexperienced, C is darkish green, D is darkish blue.
Candy Stripe Bracelet Pattern
Let’s talk about by way of the first row intimately.
Row 1
Step 1: Take string A and make a forward knot on string B. After you full the knot, string A will switch one place to the suitable. The model new order could be BACD.
Keep in mind: Forward knots are made by tying two forward half-hitches. Make a “4” kind with the working string over the second string, and pull up by way of the opening. For additional photographs and diagrams, check out this textual content about tips about learn how to make friendship bracelet knots.
Step 2: Persevering with with string A, and make a forward knot on string C. After you full the knot, string A will switch one place to the suitable. The model new order could be BCAD.

Step 3: Persevering with with string A, and make a forward knot on string D. After you full the knot, string A will switch one place to the suitable. The model new order could be BCDA.
Correctly carried out! You’ve full the first row of the Candy Stripe Pattern.
Row 2 and Previous
Repeat the an identical course of with the B strand, which is now the left-most string. (On this occasion, string B is light inexperienced.) Following the pattern, tie forward knots on each strand of the bracelet — first C, then D, then A. On the end of this row, the B string could be on the right-hand side.
Then repeat with string C and string D.
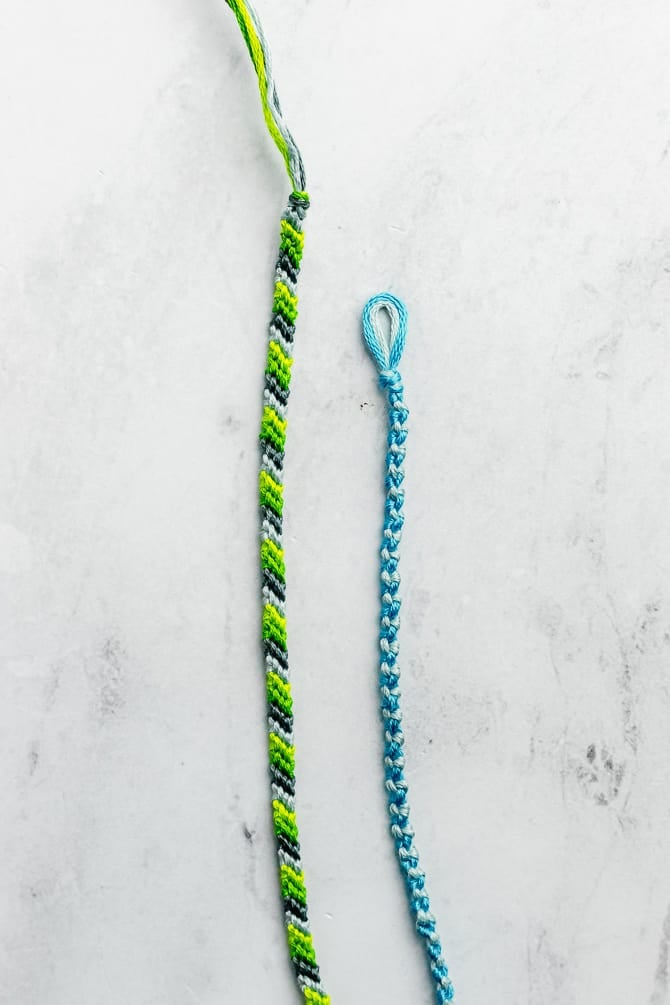
Proceed the pattern until the bracelet is as long as desired, about 7″.
Troubleshooting
Does your bracelet preserve curling?
The Candy Stripe pattern tends to twist on account of all the knots are tied within the an identical route.
There are a number of points that could be going down. First, you should definitely are making TWO half-hitches to make each of the forward knots. In case you neglect this, the bracelet could curl up. To restore it, deliberate to make two half-hitches to complete each of the forward knots.
In another case, it could be that your stress is just too tight. You might try making the knots a bit bit bit looser.
Uncover additional Friendship Bracelet Ideas
In case you want making friendship bracelets, listed below are some additional articles and free patterns to try.
What’s Subsequent?
Pin this publish: Save this tutorial to your Pinterest boards in an effort to return once more to it later.
Depart a comment: We like to hearken to your ideas. Inform me inside the suggestions beneath!
Share on Instagram or Fb: Whilst you make this enterprise, share it on social media and tag me @sarahmaker_. We prefer to see what you make!
Instructions
- Cut back each string to be about 36″ prolonged. Tie them together with an overhand knot. Use masking tape or a clipboard to secure the strings.
- Take string A and make a forward knot on string B.
- Use string A to make a forward knot on string C.
- Then, use string A to make a forward knot on string D. The model new order of colors could be BCDA.
- Proceed this pattern with each string in flip. Repeat the strategy until the bracelet is as long as you want to.
