
The diamond friendship bracelet pattern is beautiful and pleasurable to make. Although it seems to be like superior, it’s actually pretty easy! In case you favor to make friendship bracelets, it’s best to offer this diamond design a attempt!

Diamond and X’s Design
Whenever you’ve masted the elemental candy stripe bracelet and chevron bracelet pattern, you might be looking out for a sophisticated friendship bracelet pattern to attempt. In case you’re ready for a little bit of drawback, do this pleasurable diamond and x’s design.
Sooner than we get started, I’d recommend reviewing strategies to make the 4 basic knots for friendship bracelets.
Listed below are the knots you’ll need for this pattern.
- forward knot
- backward knot
- forward-backward knot
- backward-forward knot
You’ll moreover need 4 colors of embroidery floss. Do this textual content for some coloration scheme inspiration: Friendship Bracelet Color Ideas and Mixtures
Pattern Chart
Sooner than we switch on to the written pattern, I must current you the pattern chart for the Diamond and X’s pattern.
You might even see that begins out much like the chevron bracelet pattern sooner than it switches route into an inverted chevron pattern. This creates the diamonds and x’s type.

If it’s essential uncover methods to be taught charts similar to the one beneath, check out The easiest way to Be taught Friendship Bracelet Patterns. Whenever you be taught to be taught friendship bracelet patterns, you’ll have the flexibility to make any design you come all through.

Pattern Instructions
Step 1: Start by preparing the strings. Scale back 4 strings 72″ prolonged. Fold in half, so that you’ve 8 strings which could be 36″ prolonged. Tie a knot on the folded end OR make a loop buckle.
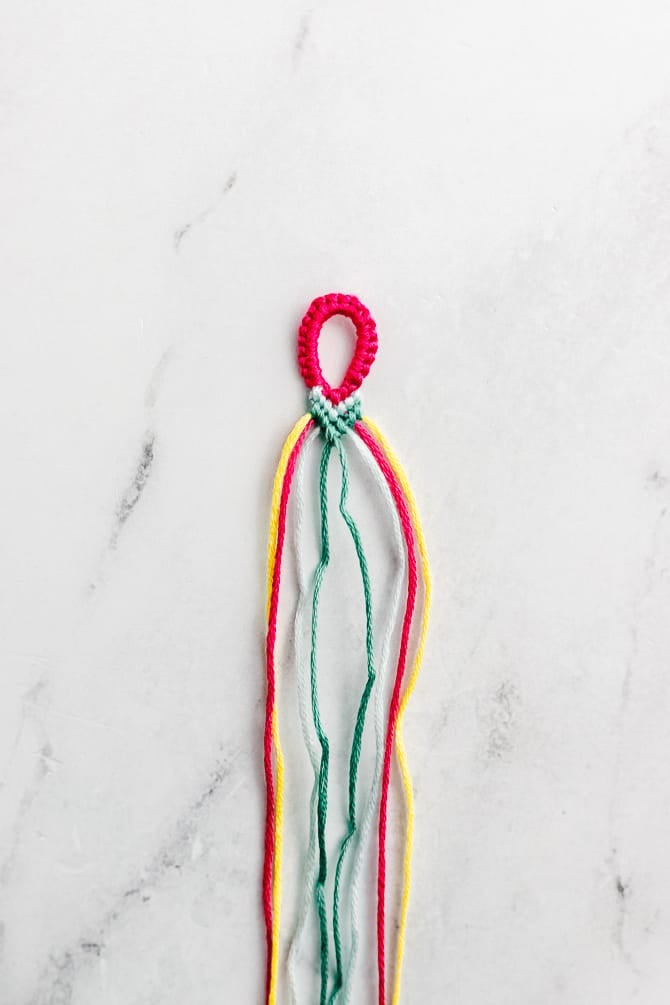
I started this friendship bracelet off with a loop buckle. It’s a great way to make a bracelet removable. To be taught additional about loops, check out: The easiest way to Make A Friendship Bracelet Loop (Buckle)
To finish the buckle: Use the left pink string to tie a forward knot onto the yellow string. Use the suitable pink string to tie a backward knot onto the alternative string. Then tie the pink strings together with a forward knot.
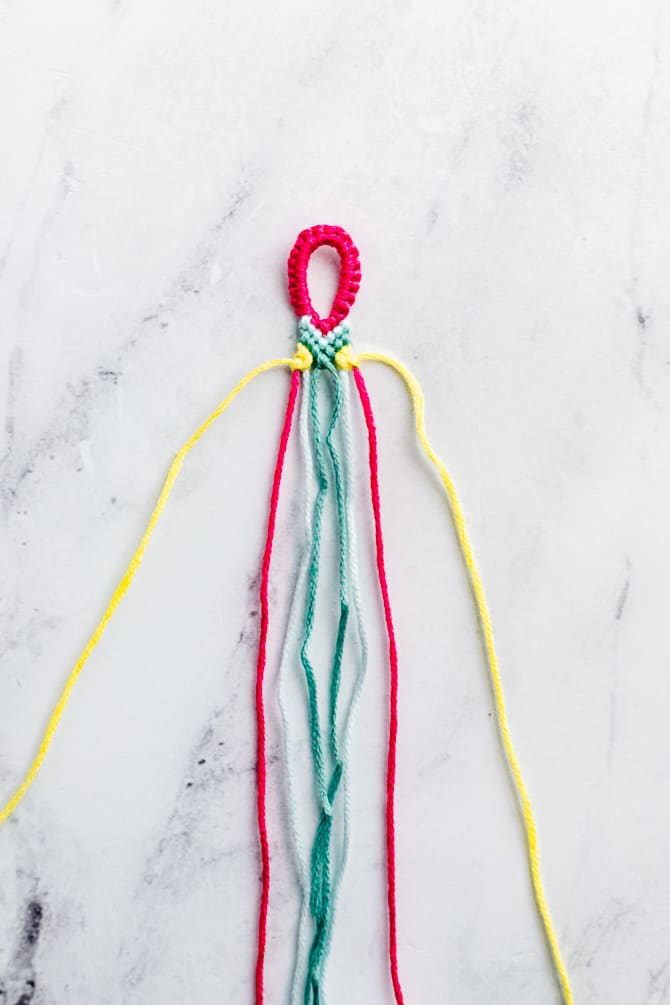
Set up the strands in your chosen coloration order, in such a method that the color order mirrors itself. As an illustration, the 8 strings in my bracelet could be light blue, teal, yellow, pink, pink, yellow, teal, light blue. Or, within the occasion you had been to label the strings, they may go: ABCDDCBA
Protected the strings with a safety pin, beneath a clipboard, or with masking tape.
Step 2: This bracelet begins out similar to the chevron friendship bracelet pattern.
Starting with the outermost left-hand string (light blue) tie forward knots on the next three strings until you attain the middle.
Keep in mind: Forward knots are tied by making a “4” type with the working string over the second string. Keep in mind, each knot in a friendship bracelet consists of two half-hitch knots. Click on on for additional particulars about strategies to tie friendship bracelet knots.
Then, with the outermost right-hand string (the alternative light blue string), tie backward knots on the next three strings until you attain the middle.
Backward knots are tied by making a “P” type with the working string over the second string. Keep in mind, each knot in a friendship bracelet consists of two half-hitch knots.
To finish the aim on the center of the “V” type, use the left-hand light blue string to tie a forward knot throughout the right-hand light blue string.
(Technically, it doesn’t matter within the occasion you make a forward or backward knot – as long as you knot one light blue string throughout the totally different.)
Your first row is now full! At this stage, it’s best to find that the order of the colors has modified. If we started with the order ABCDDCBA, it must now be BCDAADCB.

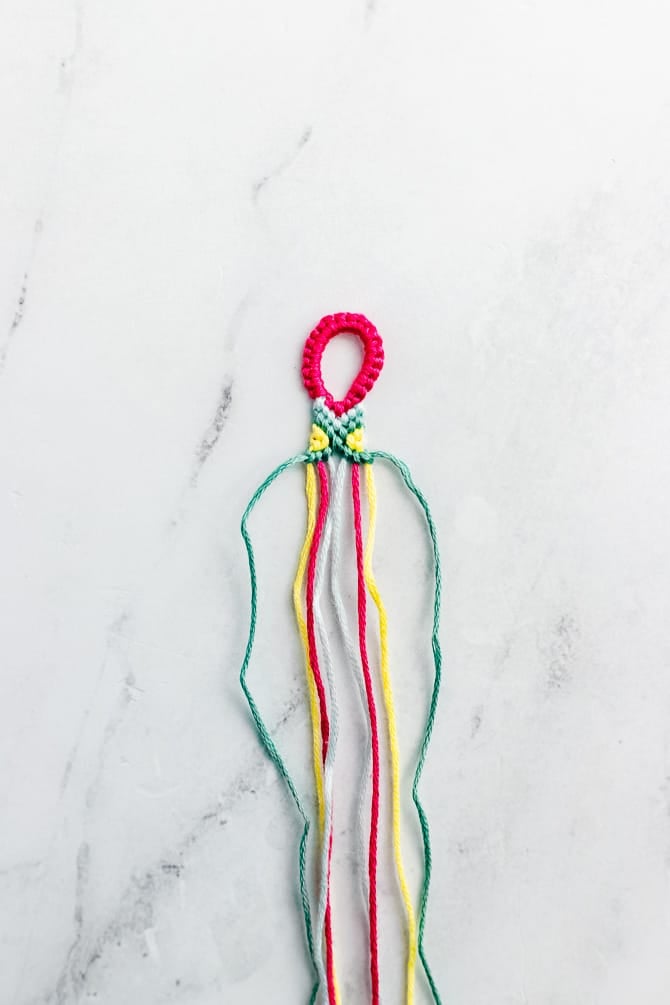
Step 3: Use the teal string to make one different row, following the an identical course of. Use the model new left-hand string (teal) to make forward knots until you attain the middle. Then, use the model new right-hand string (the alternative teal) to make backward knots until you attain the center. Tie the two teal strings together with a forward knot.
Step 4: Now it’s time to work with the yellow strings. Use the left-hand yellow string to make a forward knot throughout the pink string. Then, use the yellow string to make a forward-backward knot throughout the light blue string. Third, use the yellow string to make a backward knot throughout the pink string.
Mirror this course of on the alternative side. Use the right-hand yellow string to make a backward knot throughout the pink string. Then, use the yellow string to make a backward-forward knot throughout the light blue string. Third, use the yellow string to make a forward knot throughout the pink string.
Step 5: Use the teal strings to finish the X type. Starting with the left teal string, make backward knots onto each the left three strings until you attain the outer left-hand side.
Mirror that course of with the alternative teal string. In several phrases, use the suitable teal string to make forward knots onto the suitable three strings until you attain the outer right-hand side.
After this step, each of the teal strings should be on the pores and skin.
Step 6: Proceed the inverse chevron pattern with the light blue strings.
First, tie every of the sunshine blue strings together with a forward knot. Then, use the left light blue string to make backward knots onto each the left three strings until you attain the outer left-hand side.
Mirror that course of with the alternative light blue string. In several phrases, use the suitable light blue string to make forward knots onto the suitable three strings until you attain the outer right-hand side.
After this step, each of the sunshine blue strings should be on the pores and skin.

Step 7: Tie the pink strings together with a forward knot. Use the left pink string to make a backward knot on the yellow string, after which a backward-forward knot on the teal string. Use the suitable pink string to make a forward knot on the yellow string and a forward-backward knot on the teal string.
After this step, the sunshine blue strings must nonetheless be on the pores and skin.
Step 8: Tie the yellow strings together with a forward knot. Use the left pink string to make a forward knot on the left yellow string. Use the suitable pink string to make a backward knot on the suitable yellow string. Then, tie the two pink strings together with a forward knot.
After this step, you have acquired accomplished one repeat of the pattern chart.
Proceed until your bracelet is as about 7″ prolonged, or as long as you’d like.
To be taught in regards to the alternative routes to finish friendship bracelets, check out The easiest way to End Friendship Bracelets for A Accomplished Look.
What’s Subsequent?
Pin this submit: Save this tutorial to your Pinterest boards so to return once more to it later.
Go away a comment: We like to take heed to your recommendations. Inform me inside the suggestions beneath!
Share on Instagram or Fb: When you make this endeavor, share it on social media and tag me @sarahmaker_. We wish to see what you make!
