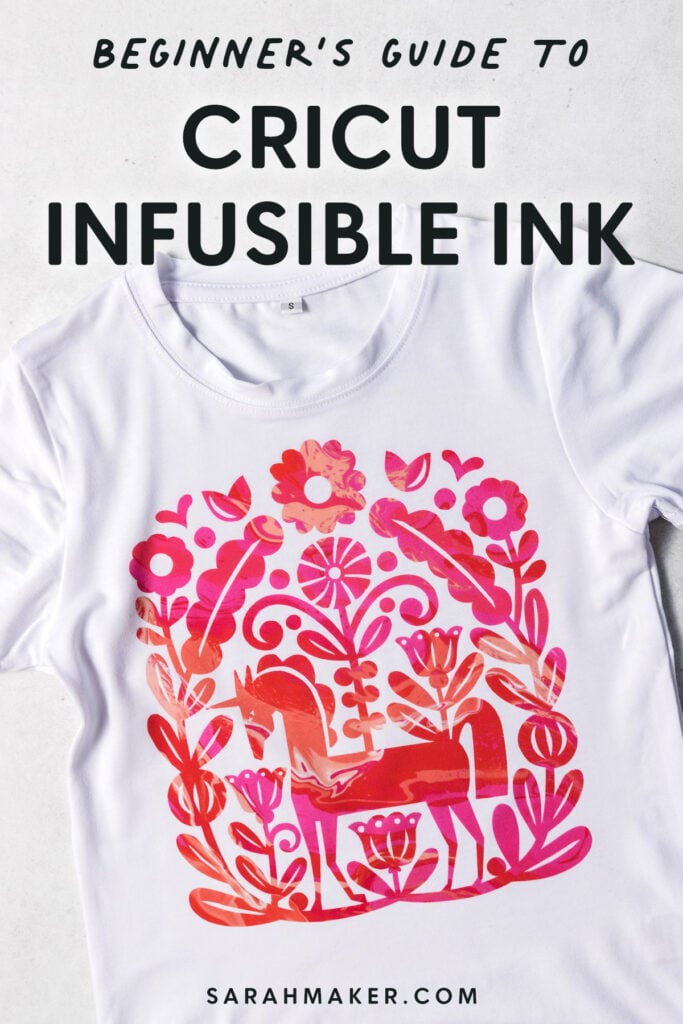
In a position to get started with Cricut Infusible Ink? On this detailed data, you’ll research all of the issues it’s advisable find out about Infusible Ink. We’ll cowl what Infusible Ink is and recommendations on find out how to use it to make vibrant craft initiatives. Plus, I’ll give you my biggest solutions and strategies so that you just get good outcomes every time.

In the event you occur to’ve been questioning recommendations on find out how to use the model new Cricut Infusible Ink, you’re in luck. On this Cricut Infusible Ink tutorial for novices, you’ll research what Cricut infusible Ink is and recommendations on find out how to use it. I’ll current you methods Infusible Ink works, and give you a list of the entire offers you’ll should make Infusible Ink initiatives. Then, I’ll give you step-by-step directions for making your first Infusible Ink enterprise, and warn you about a variety of widespread errors to watch out for.
Are you a Cricut newbie? You could possibly want to study this beginner’s data to Cricut first.
What’s Infusible Ink?
Infusible Ink is a specific ink swap product from Cricut. You need to make the most of Infusible Ink to create vivid, vibrant designs with a simple expert finish of numerous base provides.
In distinction to iron-on vinyl or HTV, which is utilized on excessive of a base supplies using heat-activated adhesive, the Infusible Ink swap fuses with the underside supplies itself. It actually turns into one with the material – which suggests the design will not ever flake, peel, wrinkle, or crack.
It’s just a bit like sublimation printing – nonetheless a whole lot simpler. Infusible Ink sublimates from a secure to a gasoline, after which infuses into the material to create a eternal bond that acquired’t fade.
Infusible Ink Provides
Infusible Ink is on the market in two codecs: swap sheets and pens/markers:
- Infusible Ink Swap Sheets may be present in numerous colors and patterns. You’ll reduce designs from Infusible Ink sheets collectively together with your Cricut, equivalent to you’d with sheets of vinyl.
- You’ll draw with Infusible Ink Pens and Markers to create your particular person swap designs. You’ll draw by hand or collectively together with your Cricut machine.
The Cricut Infusible Ink system moreover encompasses a line of applicable Infusible Ink blanks, like T-shirts, tote baggage, coasters, and mugs.
How Infusible Ink Works
Using Infusible Ink is so simple as using Iron-On or heat swap vinyl. The strategy is unquestionably pretty associated – nonetheless the last word outcomes are positively completely completely different.
Listed beneath are the important steps to creating a enterprise with Infusible Ink sheets.
- Choose your Infusible Ink sheet and your applicable clear enterprise.
- Create the design in Cricut Design Space. Load the Infusible Ink sheet onto the Cricut decreasing mat, and use your Cricut machine to cut it out. Then, weed the design.
- Lay the Infusible Ink design onto your clear enterprise, and apply heat with a Cricut EasyPress or heat press.
And, listed beneath are the important steps to creating a enterprise with Infusible Ink pens.
- Choose your Infusible Ink pens and applicable clear supplies.
- Draw your design onto laser copy paper.
- Lay the copy paper with the design onto your clear, and apply heat with a Cricut EasyPress or heat press.
There’s a bit of little bit of a learning curve to working with Infusible Ink – nonetheless don’t worry, we’ll bear all the details beneath.
What’s the excellence between Infusible Ink and Iron-On or heat swap vinyl?
In some strategies, working with Infusible Ink Swap Sheets is rather like working with Iron-On vinyl. Nevertheless, whenever you make a enterprise with Infusible Ink, you’ll see the last word outcomes are very completely completely different.
In distinction to iron-on vinyl, which sits like a sticker on excessive of a base supplies, Infusible Ink creates a eternal bond with the material itself.
On account of Infusible Ink is infused into the material, in its place of sitting on excessive of the material, your accomplished enterprise will actually really feel simple to the contact. The outcomes are a vivid, vibrant, and simple swap that acquired’t flake or peel up.
And, the image will stretch and flex with the fabric. You acquired’t get any of those ripples you’ll be able to usually get with vinyl designs on a stretchy materials
Listed beneath are one other vital variations:
- While you’ll be able to apply Iron-on to many various surfaces, you ought to apply Infusible Ink to a applicable clear supplies with a extreme polyester fiber content material materials or an appropriate polyester coating.
- Iron-on appears to be good on any coloration base supplies, nonetheless Infusible Ink works biggest on white and actually light-colored supplies.
- Iron-on is on the market in specialty finishes like glitter and holographic foil, whereas Infusible Ink is on the market in secure colors and numerous patterns.
Proper right here’s one different distinction. Infusible Ink appears to be pretty uninteresting sooner than it’s utilized. Nevertheless after it’s heated, you’ll see the true, vibrant colors on the last word enterprise.
What do I have to get started with Infusible Ink?
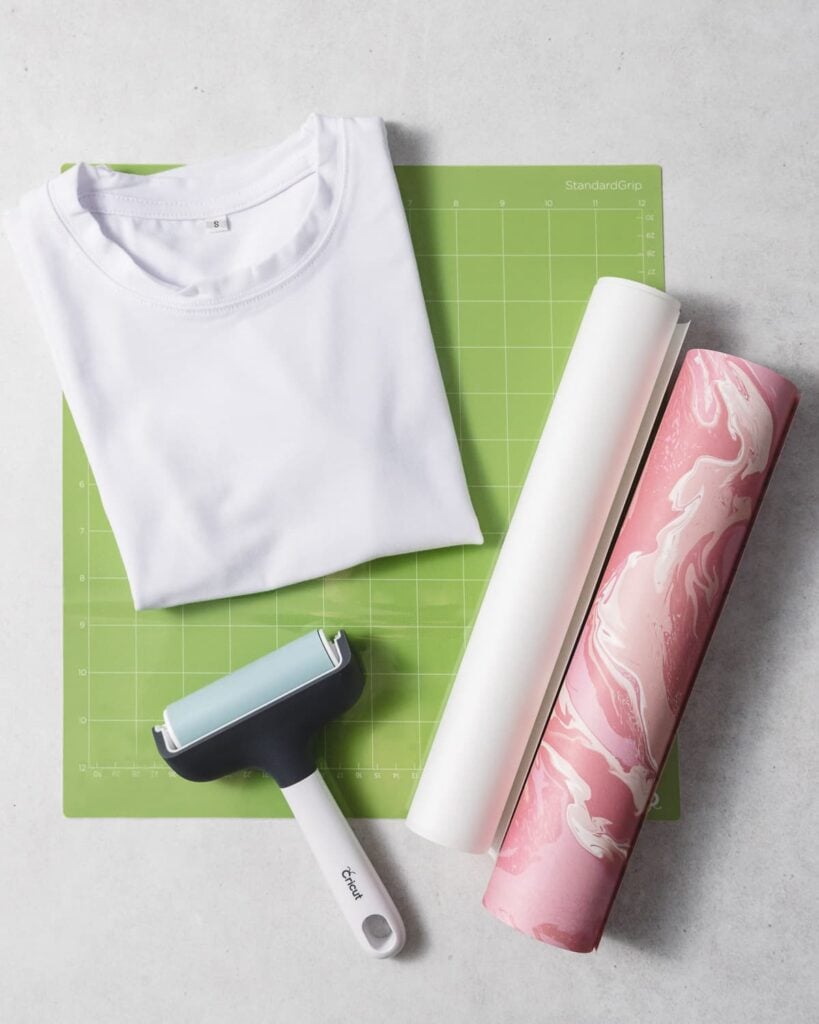
To create with Cricut Infusible Ink, you’ll need a variety of offers.
- Cricut Maker, Uncover, or Pleasure. All the current Cricut fashions can reduce Infusible Ink sheets. The one issue to recollect is that the Cricut Pleasure has a smaller most reduce measurement, so your designs should be smaller.
- Cricut Infusible Ink swap sheets. Infusible Ink swap sheets are 12″ by 12″ sheets which are out there in all types of colors and patterns.
- Butcher paper. 2 sheets of butcher paper are included inside each bundle of Infusible Ink swap sheets.
- Applicable clear objects, like shirts or mugs: The Cricut mannequin blanks are notably designed to be applicable with Infusible Ink. You might also seek for third-party “sublimation blanks” to utilize with Infusible Ink.
- Cricut EasyPress 3, or heat press: You’ll desire a provide of heat to change the Infusible Ink to your enterprise supplies. I don’t counsel using a each day iron for Infusible Ink initiatives for a variety of causes: they don’t usually get scorching adequate, they aren’t large adequate to cowl a whole design in a single go, and the steam holes inside the bottom plate intrude with a transparent swap.
- Cricut Mug Press: This software program will provide help to use Infusible Ink with explicit mug blanks.
- Cricut EasyPress Mat: I truly do counsel a flat simple pressing mat for Infusible Ink initiatives. You need full, full contact between the enterprise ground and the swap sheet for probably the greatest outcomes. And a folded towel has lumps and bumps that will intrude with a transparent swap.
- StandardGrip decreasing mat: That’s the inexperienced mat.
- White cardstock: Use this sheet of cardstock beneath your enterprise or inside your enterprise to help with even heat distribution and defend in direction of unintended ink swap.
- Paper trimmer, tweezers, and scissors: You’ll need a paper trim or scissors to trim greater swap sheets proper right down to measurement. And you may want a pair of tweezers to help weed your design.
- Lint roller: It’s vital to utilize a lint roller to wash the clear enterprise sooner than you apply the Infusible Ink. Any particles or fibers in your enterprise might create imperfections inside the final swap.
To utilize Cricut Infusible Ink pens, you’d moreover need:
- Cricut Infusible Ink markers or pens: The markers and pens can be found in numerous colors.
- Laser copy paper: Use the Infusible Ink pens and markers to draw onto the copy paper, and use the copy paper to change the design onto your enterprise.
Infusible Ink Applicable Provides
Now that you simply notice just a bit bit additional about Infusible Ink, you may be questioning, “What materials are you able to make the most of Infusible Ink on?”
And that’s question. Infusible Ink designs will solely work with a specific guidelines of applicable base provides. These base provides ought to embody polymer or polyester supplies in order to create a eternal bond with the Infusible Ink. (So no, you’ll’t use Infusible Ink on 100% cotton shirts, solely polyester shirts.)
As part of the Infusible Ink system, Cricut has launched a line of Infusible Ink applicable blanks which may be assured to work with Infusible Ink sheets, markers, and pens. The guidelines of applicable blanks incorporates t-shirts, tote baggage, small magnificence baggage, and ceramic coasters. And I’m constructive they’ll add additional Infusible Ink merchandise ultimately.
Don’t actually really feel restricted to the Cricut mannequin provides, though. Completely different merchandise labeled as “sublimation-compatible” blanks will seemingly work with Infusible Ink. You’ll merely wish to test any new-to-you provides sooner than you determine to an enormous order.
Strategies to Use Cricut Infusible Ink
In a position to study to use Cricut Infusible Ink sheets? Let’s get started.
Step 1. Choose your Infusible Ink provides and a applicable clear.
You’ll reduce designs from Infusible Ink swap sheets or draw your particular person designs with the Infusible Ink markers and pens.
Remember: Throughout the step-by-step tutorial that follows, I’ll current you recommendations on find out how to reduce and apply Infusible Ink transfers. Seek for one different tutorial to point out you recommendations on find out how to use Infusible Ink markers and pens.
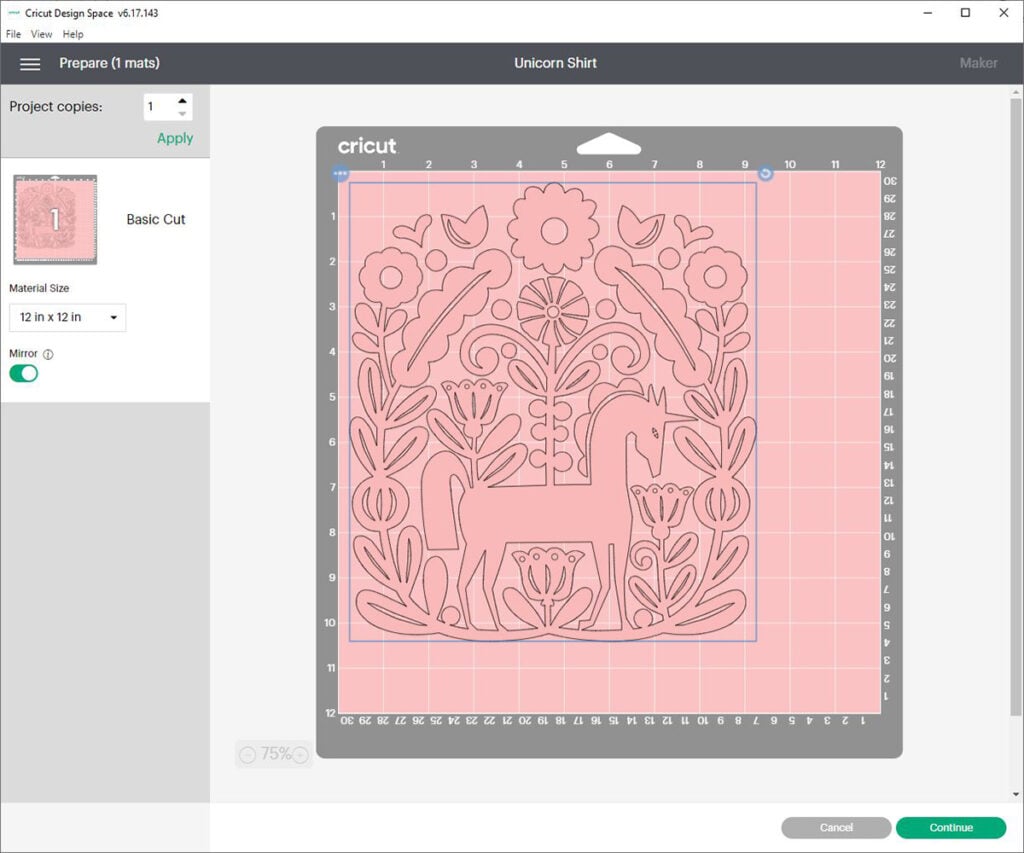
Step 2. Create your design in Cricut Design Space.
- Open up Design Space and start a model new enterprise. You’ll choose a design from the Cricut Entry Library, add an SVG reduce file, or make your particular person design with the devices on the Canvas show display in Design Space. For my enterprise, I’m using the image #M17F1AB6D that I’ve modified to go well with the T-shirt.
- As quickly as your design is full, click on on Make It to ship it to the mat.
- On the Put collectively show display, click on on the toggle button to Mirror your design.
- On the Make show display, select Infusible Ink from the guidelines of Provides settings. Load the fine-point blade into the machine.
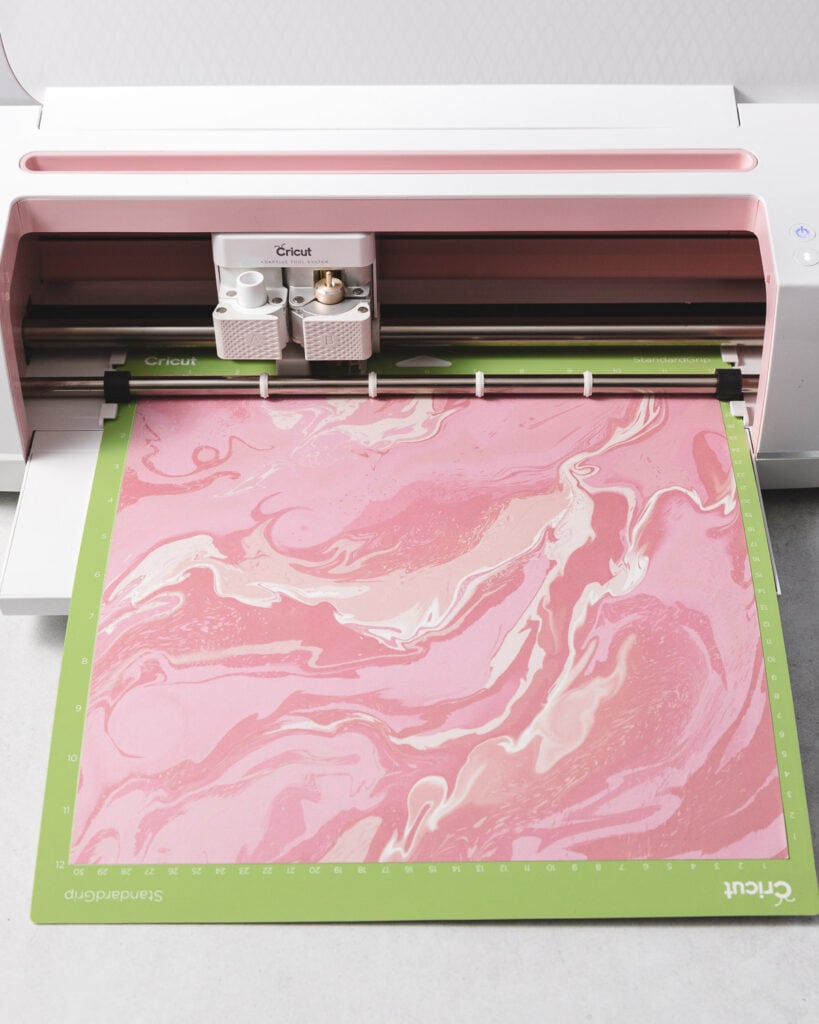
Step 3. Decrease the Infusible Ink Swap Sheet
- Subsequent, load the sheet of Infusible Ink onto the inexperienced StandardGrip decreasing mat. Place the Infusible Ink swap sheet onto the mat with the shiny facet down, and the colorful inked facet coping with facet up. You’ll roll the swap sheet with a brayer software program to make sure it’s completely adhered to the decreasing mat.
- Press the Load button to load the decreasing mat into the machine. Press the Go button to begin out the reduce.
- When the reduce is full, unload the mat. Flip the mat over onto a transparent work ground, and peel the decreasing mat away from the Infusible Ink sheet.
- Now it’s time to weed the design. Start by bending or rolling the swap sheet to loosen up the reduce objects. You could possibly hear little cracking noises as a result of the reduce objects separate – don’t worry, that’s sign.
- Then, use your fingers to remove the excess swap sheet. Make sure that your fingers are clear and dry so that you simply don’t unintentionally get any oils or lotions onto the swap sheet. Keep weeding until you’re left with merely your design on the clear liner sheet.
Strategies for weeding Infusible Ink: Weeding Infusible Ink sheets may be trickier than weeding vinyl. Cricut recommends using your fingers to weed the swap sheets, because of sharp trying to find hooks can scratch the sheets and end in undesirable ink swap.
I found that I was able to weed plenty of the design by hand. Nevertheless, I did use the reverse-grip tweezers to help me weed the smallest objects. In the event you occur to make use of tweezers, merely be careful to not scratch the ground of the swap sheet, or dig into the plastic backing.
Step 4. Put collectively your Provides
Now, prepare your workspace sooner than making use of the swap sheet.
- First, prepare your EasyPress mat on a flat, safe work ground. Place your clear enterprise on excessive of the mat. Then, place a little bit of white cardstock contained within the clear enterprise. The cardstock is there to protect your mat and your enterprise from bleed-through ink swap.
- Then, use a lint-roller to wash any fuzz or fibers from the ground of your enterprise. Don’t skip this step! Even when you’ll be able to’t see any lint, there could possibly be a variety of tiny fibers that will intrude with a worthwhile ink swap.
- Subsequent, cowl the clear clear with a sheet of butcher paper. Make sure that the butcher paper is larger than the design and greater than the plate of your EasyPress.
- Then, preheat the clear based mostly on the Cricut Heat Info. Preheating the clear is important to simple out any wrinkles and take away any moisture that may intrude with a worthwhile swap. Search recommendation from the Cricut Heat Info for the useful heat temperature and cases in your explicit enterprise.
- Lastly, take away the heat press and the butcher paper, and let the clear cool completely. Don’t be tempted to place the Infusible Ink sheet sooner than the clear has completely cooled – you don’t want to menace an unintended ink swap.
Step 5. Apply the Infusible Ink
Now that you just’ve prepped your provides, it’s time to make use of the Infusible Ink.
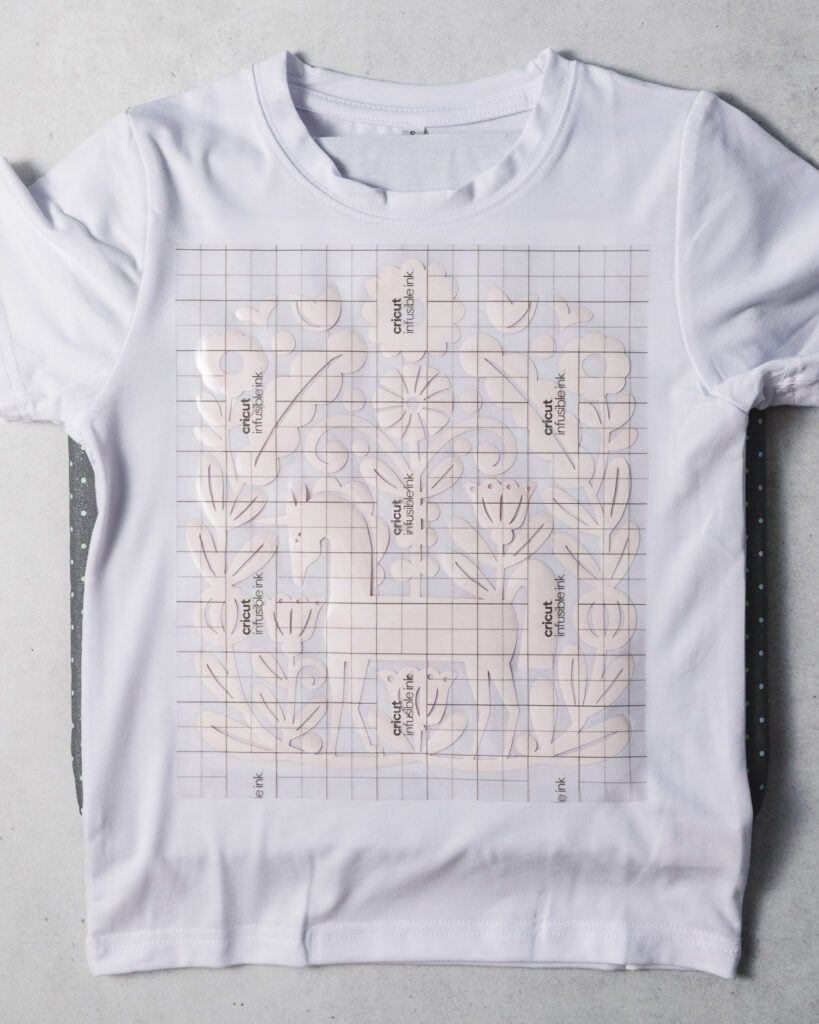
- Place the reduce and weeded design face down on the clear. The colorful facet may be coping with down, and the clear liner may be coping with up.
- Then, place a little bit of unpolluted butcher paper on excessive of your design. Be certain that butcher paper completely covers the design, and is larger than the EasyPress heat plate so that you just don’t get any ghost traces.
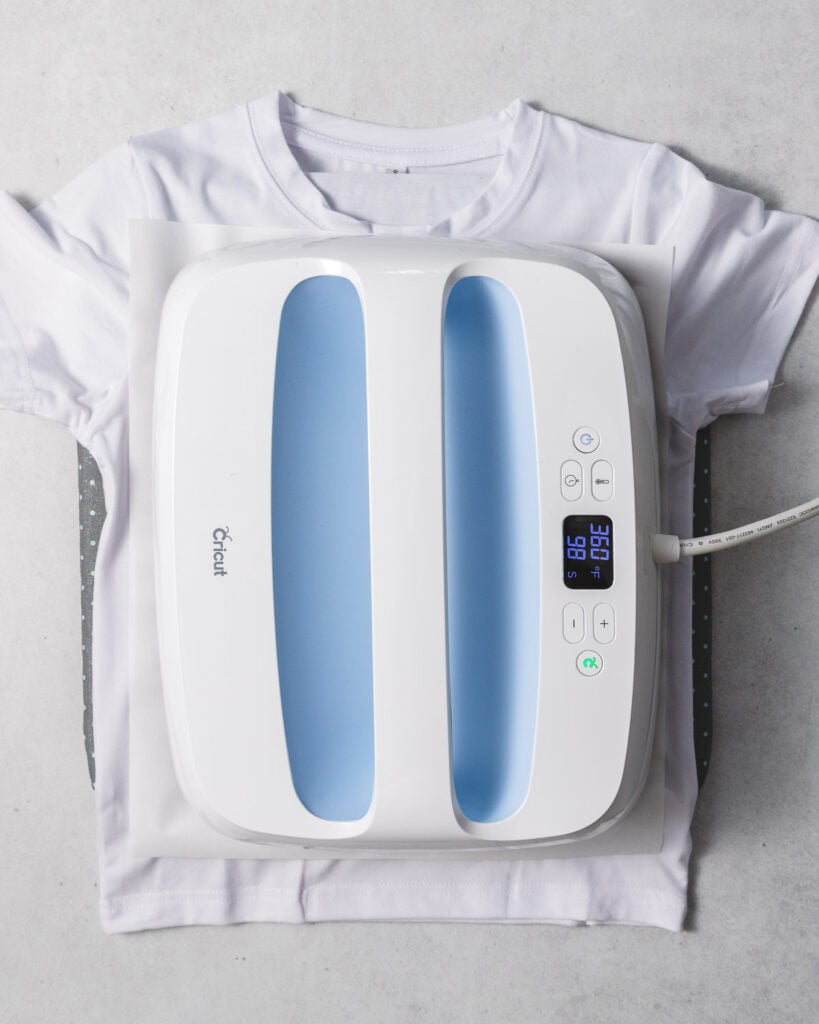
- Place the preheated EasyPress on excessive of the stack, and press based mostly on the cases and temperatures specified inside the Cricut Heat Info.
- Take away the press, being cautious to not shift the swap sheet beneath. Let the enterprise cool.
- As quickly as cool, slowly take away the butcher paper after which the swap sheet. If the paper layer separates from the clear liner, that’s okay. Fastidiously use tweezers to remove it with out sliding or shifting it spherical.
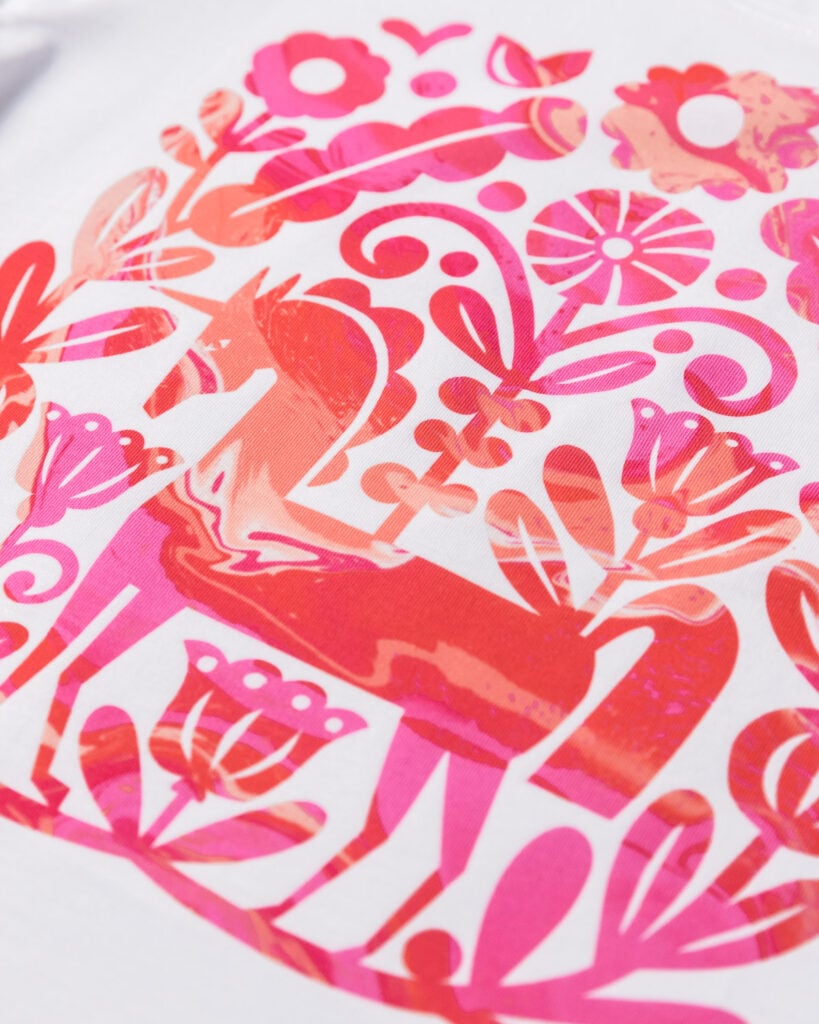
And there you go, you’ve completed an Infusible Ink enterprise. You’ll see that the ink has transferred onto the enterprise. The colors may be loads brighter than they appeared on the roll.

Caring for Infusible Ink Initiatives
You’ll wash Infusible Ink initiatives with out worrying about them fading or cracking. Listed beneath are a variety of care methods to protect them wanting their biggest.
- Machine wash inside out with chilly water and mild detergent. Do not use bleach or materials softener.
- Tumble dry on low heat or line dry. Do not use dryer sheets.
Strategies and Suggestions for Working with Infusible Ink
Listed beneath are a variety of solutions and strategies for working with Infusible Ink swap sheets.
- Take into accout to Mirror your design!
- Place the Infusible Ink sheet on the decreasing mat with the shiny facet down, and the color facet up.
- After eradicating your Infusible Ink swap sheet from the decreasing mat, roll and bend it to “crack” the reduce traces. This will likely make it hundreds less complicated to remove the excess swap sheet.
- Take the extra time to lint-roll and preheat your clear. These two little steps will take away a number of swap points shortly.
- Wait until the swap sheet is cool sooner than fastidiously eradicating it. (Take into account it like chilly peel vinyl.) Go gradual, so that you simply don’t smear the image.
- Use the Cricut Heat Info to get the correct temperature and time settings in your explicit clear and swap supplies.
Troubleshooting Infusible Ink Points
Listed beneath are some choices to some widespread factors that give you Infusible Ink.
The EasyPress is leaving marks on my shirt.
In the event you occur to don’t defend the ground of the fabric with butcher paper, the extreme heat of the EasyPress can soften it, creating shiny or discolored marks. To steer clear of press marks, make it doable for the butcher paper is larger than the heat plate.
The image appears to be blurry or smeared.
A blurry or shadowed edge in your design signifies that the design has someway shifted spherical all through pressing. This will likely happen if the design sheet, the butcher paper, or the EasyPress strikes in the middle of the software program course of.
To steer clear of blurry edges or ghosting, be sure that the design is protected on the clear. You need to make the most of Heat Resistant Tape to protected your design to the clear.
In addition to, don’t switch your EasyPress spherical whereas pressing. Infusible Ink initiatives should receive a single software program of heat. Making use of heat in sections might finish in undesirable marks in your accomplished enterprise.
The image transferred inconsistently.
If components of the image look pale or marbled, it implies that the swap sheet was heated inconsistently. Any lumps or bumps in your supplies or pressing ground – along with wrinkles, seams, buttons, and zippers – can cease the EasyPress from making full, full contact with the swap sheet.
To steer clear of inconsistent image swap:
- Be certain that your pressing ground is flat and simple.
- Preheat your supplies to remove wrinkles.
- Arrange your image swap so that it doesn’t overlap any seams or zippers.
If, for instance, you make an toddler onesie and should’t steer clear of cumbersome seams, insert a small pressing mat contained within the onesie to raise the fabric up so it might make full contact with the EasyPress.
Have questions? Be a part of the Fb Group!
We hope this textual content was useful for you! When you have got any additional questions, be at liberty to affix my Fb Group. We created this group with the intention to share images, ask questions, and help each other out.

I hope this textual content was useful for you! When you have got any additional questions, be at liberty to affix my Fb Group for Cricut Crafts.
Be a part of the group to share images, ask questions, and help each other out.
Additional Cricut Tutorials and Endeavor Ideas
In the event you occur to love crafting with Cricut, I imagine you’ll like these related posts.
And, for additional particulars in regards to the Cricut devices you actually need, study my Full Info to Cricut Devices and Tools.
What’s Subsequent?
Pin this publish: Save this tutorial to your Pinterest boards in order to come back once more to it later.
Depart a comment: We like to hearken to your solutions. Inform me inside the suggestions beneath!
Share on Instagram or Fb: In the event you make this enterprise, share it on social media and tag me @sarahmaker_. We prefer to see what you make!
Provides
- Infusible Ink swap sheets
- Butcher paper (included with swap sheets)
- Applicable clear merchandise
- White cardstock
Devices
- Cricut machine
- Cricut EasyPress 3
- Cricut EasyPress Mat
- StandardGrip decreasing mat
- Paper trimmer, tweezers, and scissors
- Lint roller
Instructions
- Create your design in Cricut Design Space. As quickly as your design is full, click on on Make It to ship it to the mat. Make sure that to Mirror your design. Then, select Infusible Ink from the guidelines of material settings and cargo the fine-point blade into the machine.
- Place the Infusible Ink swap sheet ink-side-up onto the inexperienced decreasing mat. Load the decreasing mat into the machine, and press the Go button to begin out the reduce.
- When the reduce is full, unload the mat. Take away the swap sheet from the mat, and bend it just a bit to separate the cuts.
- Weed the design with clear, dry fingers. You need to make the most of tweezers to remove the smaller objects, nonetheless be careful to not scratch or gouge the swap sheet.
- Prepare your workspace for pressing. Place a little bit of cardstock inside your clear merchandise.
- Use a lint roller to wash your clear merchandise, and cover it with a sheet of butcher paper. Then, preheat the clear based mostly on the Cricut Heat Info. Let it cool, and take away the butcher paper.
- Place the swap sheet ink-side-down onto the clear clear. Subsequent, place the butcher paper on excessive of the swap sheet. Then, press with the EasyPress 2 based mostly on the Cricut Heat Info.
- Let cool, then fastidiously take away the butcher paper after which the swap sheet.