
Friendship bracelets are that conventional summer season camp craft that you simply simply’ll must make all 12 months prolonged! Whether or not or not you favored making them as a toddler or are finding out to make them for the first time, this straightforward DIY tutorial will prepare you each little factor it’s a must to study making friendship bracelets.

DIY Friendship Bracelets
Making friendship bracelets is a pleasurable DIY craft endeavor because of it’s easy to review, easy to take with you anyplace, and simple to share together with your friends. It’s positively a kind of “rites of passage” actions that each one of us do at sleepovers and summer season camps. Plus, matching bracelets make good presents to your best buddies!
If you examine the basic methods, check out these easy friendship bracelet patterns. From straightforward braids to fancy diamond patterns, there’s no limit to the beautiful friendship bracelets you can create!
Gather Your Offers
You don’t need hundreds to get started making pleasurable friendship bracelets. All you need is a couple of embroidery floss, and one factor to hold your bracelet nonetheless while you make the knots. Listed below are our favorite tried-and-true supplies:
To make points easier in your self, you may moreover resolve up a helpful friendship bracelet package deal.
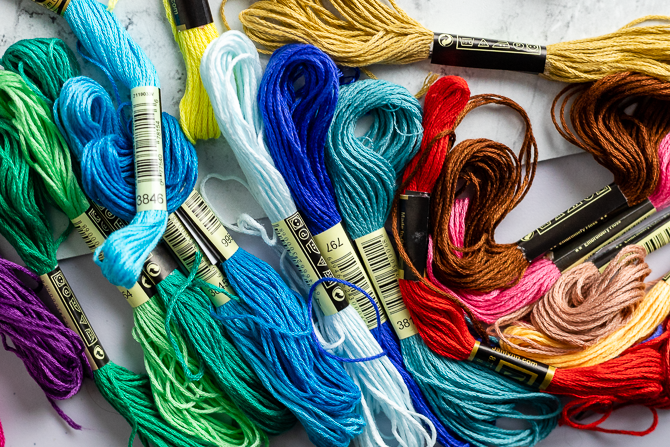
Friendship Bracelets String
The simplest string for friendship bracelets is called embroidery floss. Embroidery floss is a clear, 6-stranded cotton string with a slight shine. It’s accessible in a giant variety of colorsalong with neons and metallics. Frequent producers of embroidery floss embrace DMC, Anchor, and J&P Coats.
Start with the 4 Basic Knots
Even primarily essentially the most refined friendship bracelets are tied with the equivalent straightforward knots.
There are 4 basic friendship bracelet knots that it’s a must to examine. If you examine the right knots, you’ll be able to make and design your private BFF bracelets with ease.
Each of the 4 knots consists of two half knots – known as half-hitches. The 4 basic friendship bracelet knots use two half-hitches stacked collectively in a number of mixtures.
- Forward knot: forward hitch + forward hitch
- Backward knot: backward hitch + backward hitch
- Forward-Backward knot: forward hitch + backward hitch
- Backward-Forward knot: backward hitch + forward hitch
For a full rationalization of the varied sorts of friendship bracelet knots, with quite a few diagrams and pictures, it’s best to undoubtedly be taught One of the simplest ways to Tie the 4 Basic Friendship Bracelet Knots.
Examine to Be taught Friendship Bracelet Patterns
Friendship bracelet makers have created pattern charts that you may adjust to to create pretty designs. They may seem tough at first, nevertheless while you understand one of the simplest ways to be taught friendship bracelet patterns, you’ll positively need them to written patterns.

Websites like friendship-bracelets.web and braceletbook.com have a seemingly numerous present of friendship bracelet patterns. Stripes, chevrons, hearts, arrows – regardless of design you can think about, you may discover!
Finding out friendship bracelet patterns is easier than you assume! Click on on to be taught my in-depth tutorial that may prepare you one of the simplest ways to be taught the friendship bracelet symbols and pattern grids.

Deciding on Friendship Bracelet Colors
You probably can change up the look of a bracelet pattern by choosing completely completely different colors of thread or arranging them in a particular color order. In case you need some color palette inspiration, check out this textual content all about choosing the proper color combos to your subsequent friendship bracelet: Friendship Bracelet Shade Ideas and Combos
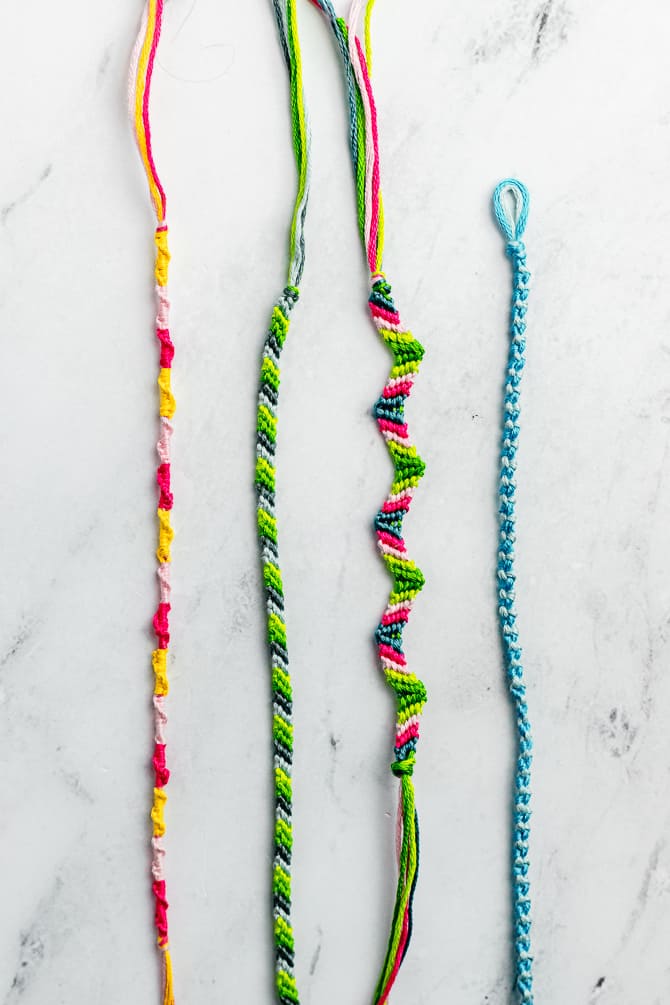
Beginner Friendship Bracelet Patterns
Listed below are a couple of of the commonest beginner patterns:
And for those who’ve accomplished these, listed under are some easier friendship bracelet patterns.
Candy Stripe Bracelet

For this pattern, you solely should know one of the simplest ways to tie Forward knots.
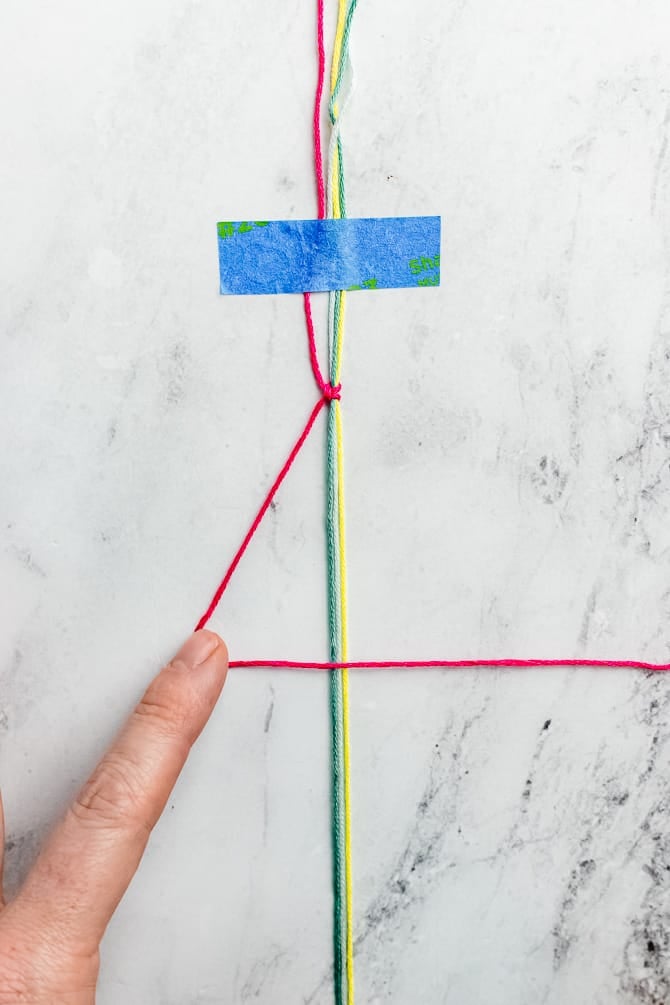
- Reduce 4 strands of embroidery floss about 36″ prolonged. Tie together with a straightforward overhand knot and secure to a flat ground with tape. Or, clip the tip of the bracelet to a clipboard.
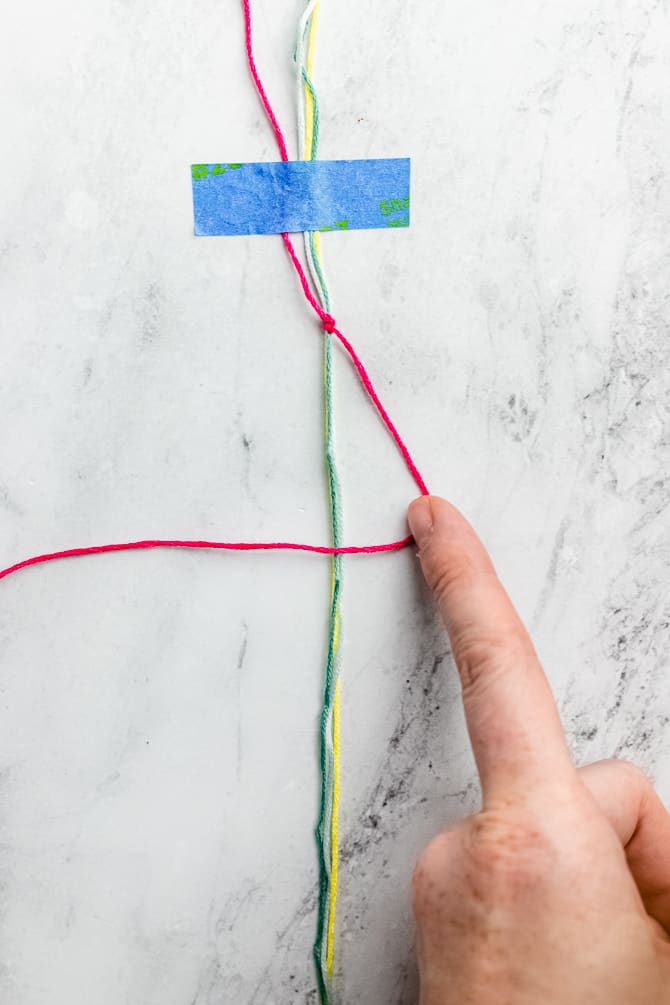
- Take the left-hand string (A) and make a forward knot onto the first strand, the second strand, after which the ultimate strand of floss. The A string will now be on the right-hand side.
- Take the model new left-hand string (B) and make a forward knot onto each of the next three strings.
- Repeat the strategy with each new left-hand strand (C, D, and so forth), working your means all through the bracelet. Proceed until you’ve reached your required measurement. For a lot of wrists, you’ll need 6 inches worth of bracelet. Make sure to depart ample space on the 2 ends so you can tie the bracelet on.
For a additional detailed pattern with rather more pictures, check out: One of the simplest ways to Make a Candy Stripe Friendship Bracelet
Chevron Bracelet Pattern
For this pattern, it’s a must to know every the Forward and Backward knots.
If it makes it easier to visualise, you can think about the chevron pattern as two back-to-back candy stripe bracelets.
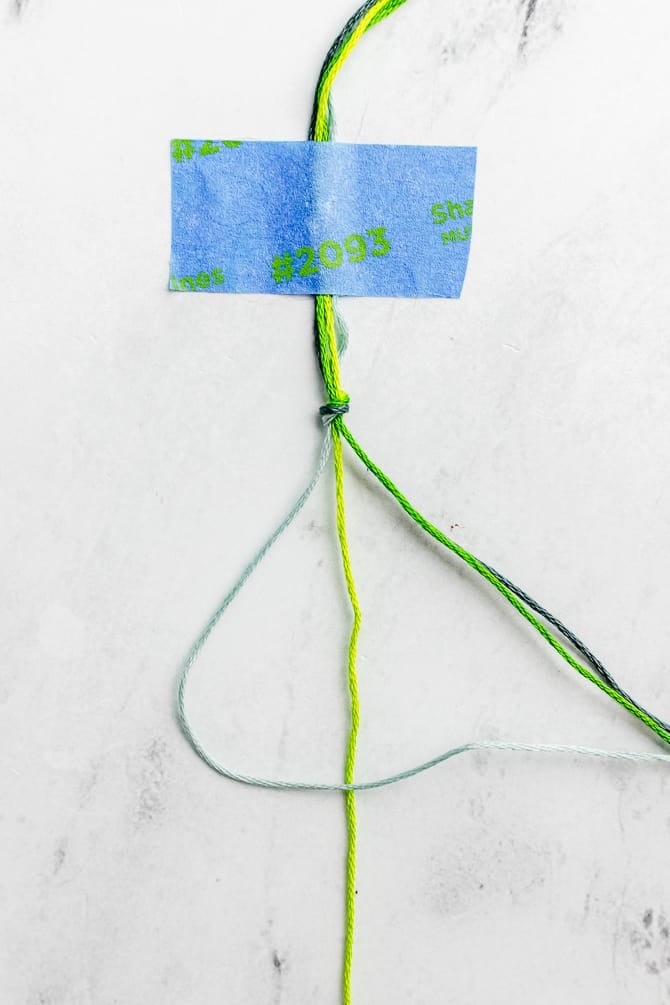
- Reduce 72″ lengths of each of the 4 colors. Fold the strings in half and tie a knot on the folded end.
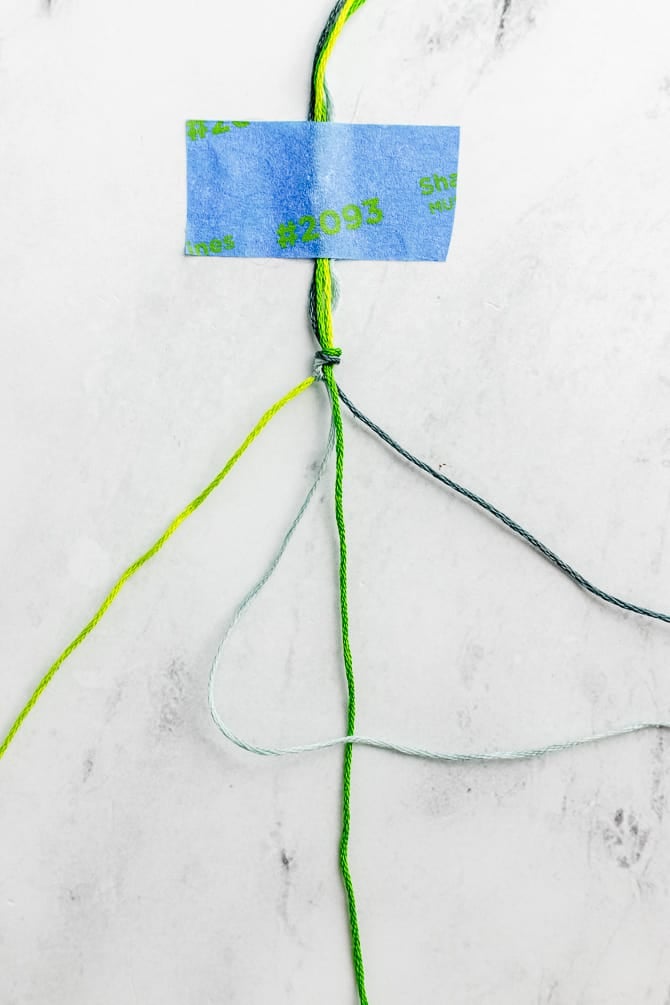
- Starting with the outermost left-hand string tie forward knots on the next three strings until you attain the middle.
- Using the outermost right-hand string, tie backward knots on the next three strings until you attain the middle.
- To finish the aim on the center of the chevron’s “V” type, use the left-hand string to tie a forward knot throughout the right-hand string.
- Proceed making additional rows by repeating the strategy with the alternative strings.
For a additional detailed pattern, along with additional pictures and a pattern chart, check out: One of the simplest ways to Make a Chevron Friendship Bracelet
Diamond and X’s Pattern
For the diamond pattern friendship bracelet, it’s a must to know one of the simplest ways to tie all 4 basic knots.
This bracelet begins out similar to the chevron friendship bracelet pattern.
- The first row and second row are the equivalent as a result of the chevron pattern. Each of the outer strings is tied in in direction of the center to make V shapes.
- Then the pattern is flipped to make an upside-down chevron type. This creates the X and diamond shapes.
For a additional detailed pattern, along with pictures and a pattern chart, check out: One of the simplest ways to Make a Diamond Friendship Bracelet Pattern

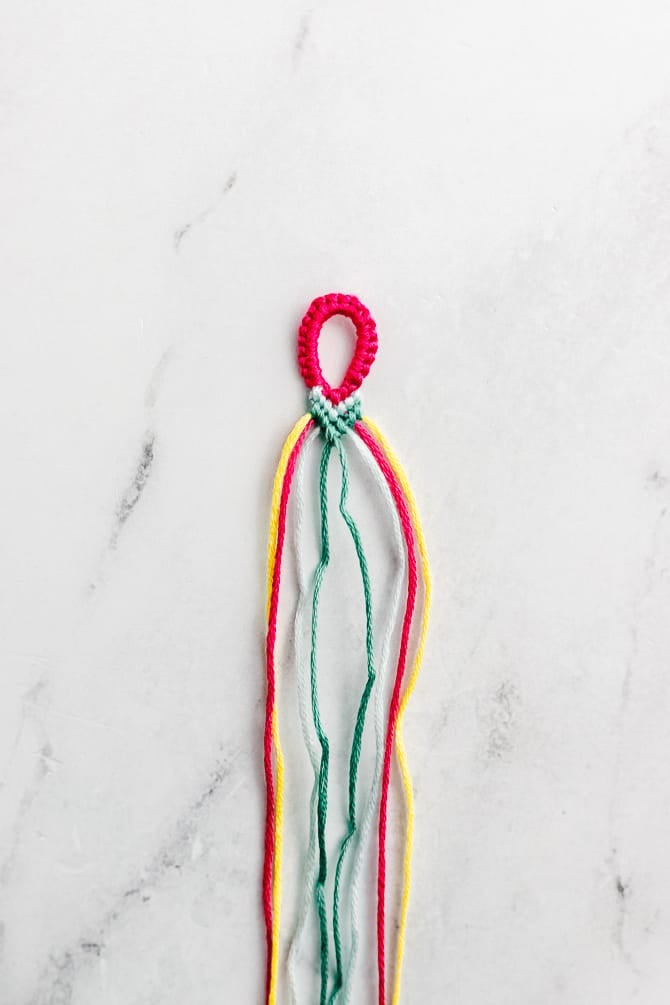
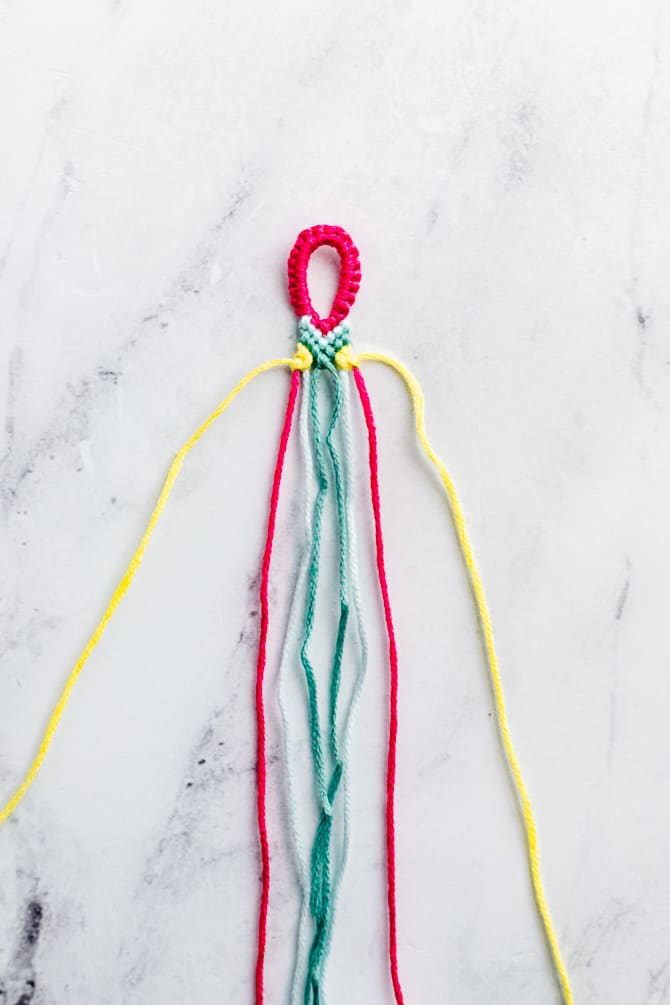
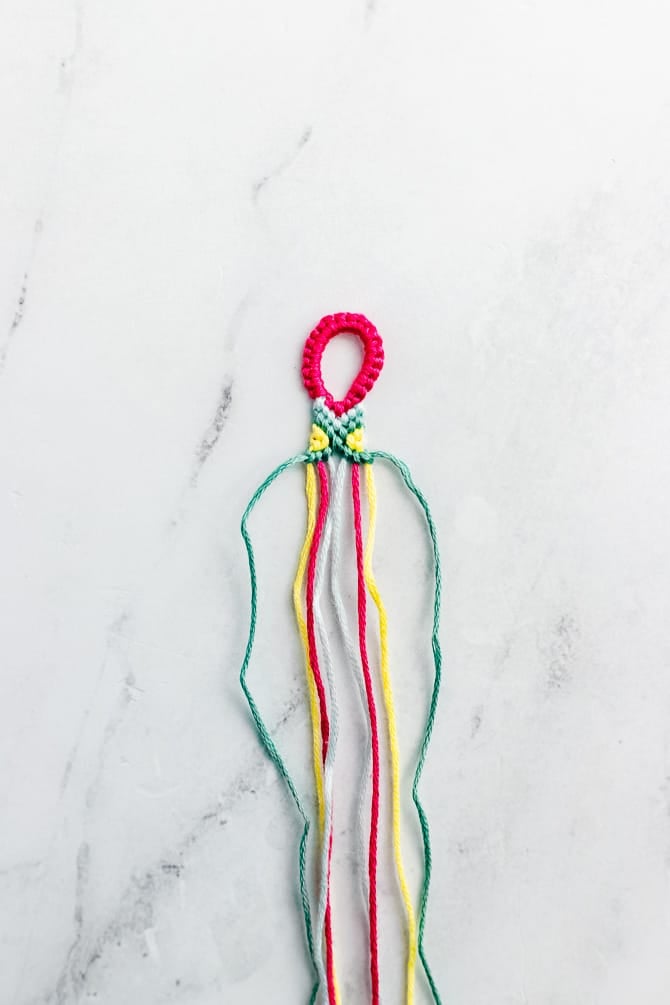
One of the simplest ways to Start and Finish Friendship Bracelets
It’s fully super to begin out and end bracelets with straightforward overhand knots. Tie the knots on each end, and go away about 4″ prolonged tails.
Nevertheless, there are an entire lot of various cool strategies to begin out and end friendship bracelets, like buckles, teardrop loops, buttons, adjustable knots, and further.
In case you might be questioning one of the simplest ways to begin your bracelet with a loop, it’s best to undoubtedly be taught: One of the simplest ways to Start and End Friendship Bracelets for A Accomplished Look
Frequent Questions on Bracelets
Listed below are some incessantly requested questions (FAQs) about making friendship bracelets.
How prolonged must the thread be for a friendship bracelet?
For many conventional bracelet patterns, each thread ought to start about 36″ prolonged. If in case you might have two strands of each color, you may start with a string that’s 72″ prolonged and fold it in half to make two halves that measure 36″.
If in case you might have a pattern the place one color is used excess of completely different colors, then that string should be cut back longer.
What to do within the occasion you run out of string?
In case you run out of string in the midst of a bracelet, you can join additional string.
Tie the extension string onto the transient string with a sq. knot. For extra insurance coverage protection, you can dab a dot of superglue onto the knot. It is okay to have the tip gadgets protruding.
Proceed on with the pattern. Maintain the unfastened ends on the underside of your work. If you end up achieved alongside together with your bracelet, you can glue them down with additional super glue, or snip them off.
Why does my bracelet have holes?
When you first start making bracelets, it could be tough to get the fitting strain.
In case your strain is simply too unfastened, your bracelet can have holes in between the knots. (Alternatively, in case your strain is simply too tight, the knots can flip to the unsuitable color!)
When you’re tying knots, try and comfy up the model new knot immediately subsequent to the sooner row. On this case, observe does truly make good.
Why is my bracelet curling up?
There are a couple of points that would probably be occurring when your bracelet is curling up. First, be certain you make TWO half-hitches to make each of the knots. In case you overlook this, the bracelet might curl up.
Or, it might probably be that your strain is simply too tight. You probably can attempt making the knots a little bit of bit looser.
And, it’s important to take into account that positive patterns, similar to the Candy Stripe pattern, are additional prone to curling.
How do you flatten curled friendship bracelets?
One technique to straighten friendship bracelets is to dam them with water. Get your bracelet barely moist, place it in between paper towels, and let it dry beneath a heavy e guide.
You’ll be able to even attempt ironing the bracelet using a garments iron or a hair straightener. Sooner than you do this, make sure that the embroidery floss you may be using is 100% cotton!
Additional Bracelet-Making Ideas
In case you’re keen on making DIY jewelry, chances are high you may be fascinated about these related posts:
What’s Subsequent?
Pin this submit: Save this tutorial to your Pinterest boards in order to return once more to it later.
Depart a comment: We like to hearken to your strategies. Inform me throughout the suggestions beneath!
Share on Instagram or Fb: When you make this endeavor, share it on social media and tag me @sarahmaker_. We wish to see what you make!
