")
Be taught to start your friendship bracelets with a simple loop buckle with this beginner-friendly tutorial. Removable closures, like this teardrop loop buckle, give your bracelets a refined, expert finish. Plus, they make it so much less complicated to take bracelets on and off!
")
Friendship Bracelet Loops and Buckles
Loop closures, moreover referred to as buckles, are an superior strategy in order so as to add to your DIY friendship bracelet making repertoire.
I actually like starting my friendship bracelets with loops or buckles because of they create a removable closure. Loops and buckles make it easy to take friendship bracelets on and off.
This tutorial will stroll you via the tactic of tying a loop or buckle constructed from one in every of many strings inside the bracelet pattern.
Sooner than we get started, be at liberty to analysis my completely different articles, Learn to make Friendship Bracelets and Learn to Tie the 4 Elementary Friendship Bracelet Knots.
Loop Tutorial
Step 1: Choose your pattern and bracelet colors.
This tutorial will work with any bracelet pattern that has a good number of strings, and two strings of each shade. (i.e. patterns the place you fold the strings in half to create a symmetrical design.)
In case you need some examples of nice patterns, the Chevron bracelet pattern and the Diamonds bracelet pattern work very effectively with this method.
Decrease your strings to the required measurement, nonetheless it’s best to undoubtedly decrease the string you might want to use for the loop about 6-8 inches longer than the remaining.


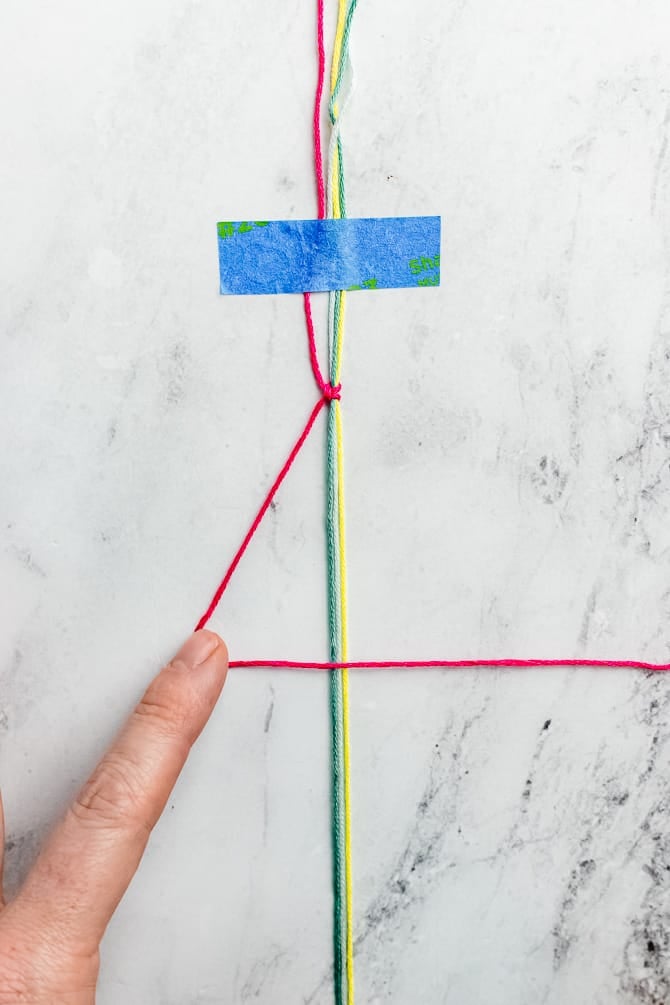
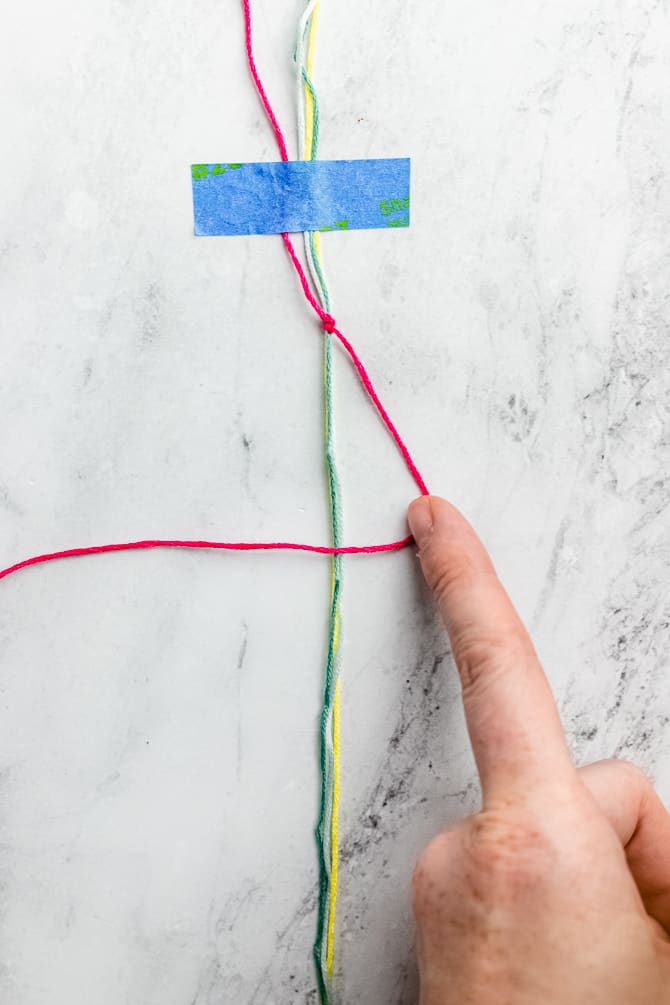
Step 2: The loop begins with a simple Lark’s Head knot.
Fold the loop string (pink inside the photos) in half. Slip the folded end of the loop string beneath the alternative bracelet strings at their half-way degree.
Pull the ends of the loop thread up by the folded end. Pull to tighten.


Step 3: Now that loop string is tied on to the rest of the bracelet strings, we’re in a position to start the rest of the loop.
Use tape or a clipboard to secure the strings. Starting on one side, alternate tying forward half hitches and backward half hitches. Work until you will have about 1/2 inch of knots.
The string ought to start on the left side, and end on the left side in case you’re achieved.
Step 4: Flip the bracelet spherical, and work down the alternative side.
Use the similar strategy, tying alternating forward and backward half hitches until you attain your required measurement. The string ought to start and end on the right side.
For bracelets with 8-10 strings, I favor to tie an inch of knots.

Step 5: The loop/buckle half is full! Fold it in half and arrange your strings inside the proper order to begin your bracelet pattern.
In case you need any help learning pattern charts, it’s best to undoubtedly attempt Learn to Be taught Friendship Bracelet Patterns.

Step 6: At this degree, you might choose to easily start your bracelet pattern or tie some macrame sq. knots throughout the pattern strings. This makes a narrower closure which may be useful to secure bracelets.

Further Buckle Strategies
For rather more easy strategies to start and end friendship bracelets, do this textual content: Learn to Start and End Friendship Bracelets for A Accomplished Look
Click on on the hyperlink to find methods to finish your bracelets with an adjustable bead or button closure for a professional-looking finish.
Uncover Further Friendship Bracelet Ideas
In case you want making friendship bracelets, likelihood is you may be taken with these free tutorials and bracelet patterns.
What’s Subsequent?
Pin this publish: Save this tutorial to your Pinterest boards in order that you possibly can come once more to it later.
Go away a comment: We like to take heed to your options. Inform me inside the suggestions beneath!
Share on Instagram or Fb: Everytime you make this mission, share it on social media and tag me @sarahmaker_. We wish to see what you make!

Instructions
- Decrease your strings to the required measurement, and decrease the string you might want to use for the loop about 6-8 inches longer than the remaining.
- Make a lark’s head knot with the loop string: Fold the loop string in half. Slip the folded end of the loop string beneath the alternative bracelet strings at their half-way degree. Pull the ends of the loop thread up by the folded end. Pull to tighten.
- Use tape or a clipboard to secure the strings. Starting on one side, alternate tying forward half hitches and backward half hitches. Work until you will have about 1/2 inch of knots.
- Flip the bracelet spherical, and work down the alternative side. Tie alternating forward and backward half hitches until you’ve got bought tied an entire 1-inch measurement of knots.
- Fold the strings in half to make the loop. Optionally, tie some macrame sq. knots throughout the pattern strings.